I have been thinking a lot about the state of our historical costuming and cosplay communities lately. Specifically, I have been pondering the extent of racism and other forms of bigotry and discrimination. These thoughts were brought forth in part by my friends Christine and Samantha writing, late last year and early this year, about the racism they have experienced as historical costumers of Asian descent. As an Asian American costumer and cosplayer myself, I could relate to a lot of what they were saying. Then the whole Asian American community was thrown into turmoil over racism and attacks stemming from the coronavirus. In addition to being worried about getting sick, I was (and still am) scared of being harassed in public as some sort of foreign disease carrier only because my family was, multiple generations ago, from China. And then came the horrific murder of George Floyd and the ensuing protests against police brutality and against the systemic racism that Black Americans face every day.
Cosplay and historical costuming are meant to be hobbies that allow us to be someone other than who we are in our non-costuming lives. By their nature, they should be inclusive and have no prerequisites in terms of a person’s appearance or background. They allow us to express our love for a character or for a period of fashion. However, that ideal is not equally available to everyone. The US power structure and the media that reflects it is very white, and largely Christian and straight. That fact permeates everything, including our hobbies. If you were to form an image in your head of a canonical historical costumer, chances are it would be a white woman. And that default creates conscious or unconscious biases, even for well-meaning cosplayers and costumers.
People who do not fit the standard mold are made to feel lesser, or are singled out as exotic, or or are just plain ignored. Several times at historical costuming events, I have had someone come up and start talking to me as if they had met me before or knew who I was, when I had not met them before. At some point in these conversations, it became clear to me that I had been mistaken for another Asian costumer. And I would wonder, “do we really all look alike to you?” Many other cosplayers and historical costumers have reported similar things happening, if not much, much worse. As a result of experiences like these, many people are discouraged from participating in cosplay or historical costuming, which then perpetuates a lack of diversity going forward. And the cycle continues.
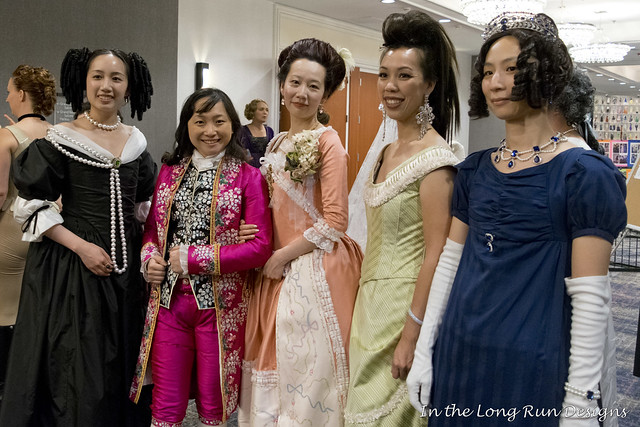
A photo of me with (from left to right) Vivien, Christine, Bunny, and AJ. We have all been confused for one another at some point.
The question becomes, how can we stop this cycle? First, we must each consider whether we have biases that have caused us to act unwelcoming, or worse, bigoted. Some of these things may be unintentional, but still hurtful to others. Identifying these behaviors and making a conscious effort to change them is important. Second, we should increase the visibility of costumers and cosplayers that do not fit the standard mold. For people with large online followings, that means sharing other people’s work and collaborating with diverse creators. For cosplay photographers, that means working with models that are, to put it frankly, not only thin white women. Seeing a portfolio that only features that type of model is discouraging to cosplayers that look different from that, and makes them way less likely to hire or collaborate with you for shoots. I have definitely been turned off from some photographers when I see the lack of diversity on their Instagram feeds. For all members of the community, that means considering ways to foster diversity when doing things like organizing events, attending an event, or interacting online. Reach out and encourage new costumers who are different from you. You already share an interest in common, so that is a great place to start.
Remember, this process is a marathon, not a sprint. Every February, when 28 Days of Black Cosplay (or 29 Days of Black Cosplay for leap years) comes around, I have seen people worry that the shows of support are fleeting or just bandwagon participation for attention. To be blunt, when Black cosplayers see that others only post about them once a year, that behavior comes off as fake or crass. Other times POC costumers are disappointed when the only other people interacting with awareness campaigns are themselves POC. That does not widen the reach of the community. In February and May of this year, I did a series sharing Instagram accounts of Black historical costumers and Asian historical costumers, respectively. I was saddened to see that the vast majority of people engaging and sharing those posts at that time were other POC. It was not until this past couple weeks that I saw major support from white members of our community, sharing my posts and linking directly to POC and LGBTQ accounts. I fervently hope that current momentum will continue. Because if it does not, that is doubly discouraging to those who feel like they were taken advantage of for a fad.
When I first heard about 28 Days of Black Cosplay several years ago, it made me stop and consider what photos I was posting, particularly as a photographer. I saw that Mike and I were photographing some POC models besides me, but also that our work could still be more diverse. Since then, we have made a concerted effort to do better, both in terms of who we work with for pre-arranged photo shoots and who we photograph in hall shots. But we can still improve. Now, each year at the beginning of 28 Days of Black Cosplay, I use that time as an opportunity to take stock of whether we are maintaining our commitment to diversity, in terms of engaging with Black costumers, other POC, and other people from diverse backgrounds. It is a reminder to me that these issues are ones I need to think about year round.